In today's post I would like to show you how to set up your SillyTavern as a Docker container and, if necessary, migrate existing data (character and chat histories) into the Docker installation. The Docker installation of SillyTavern also has the advantage that you can run the application 24/7 without having to switch on your desktop computer. You can then use your smartphone to open the SillyTavern UI via the IP.
Prerequisites:
- Existing Linux installation (possibly additional VM/Container in Proxmox)
- Portainer (installation instructions here)
- docker-compose.yml (see below or Original)
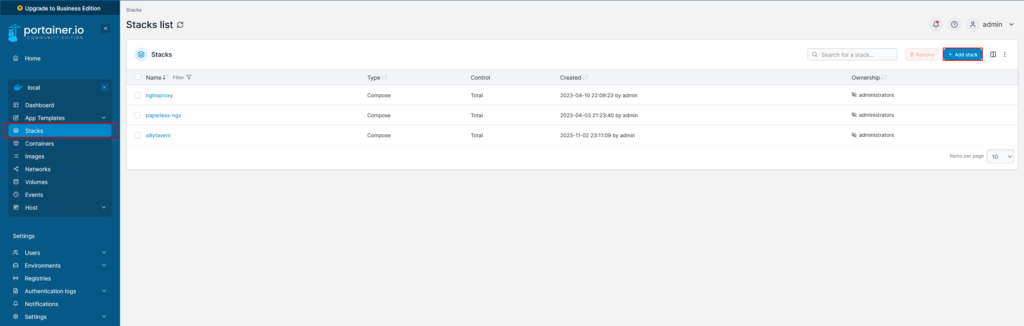
Deploy SillyTavern Docker containers in Portainer
In der frischen Portainer Installation klickt ihr dann auf „Add Stack“.
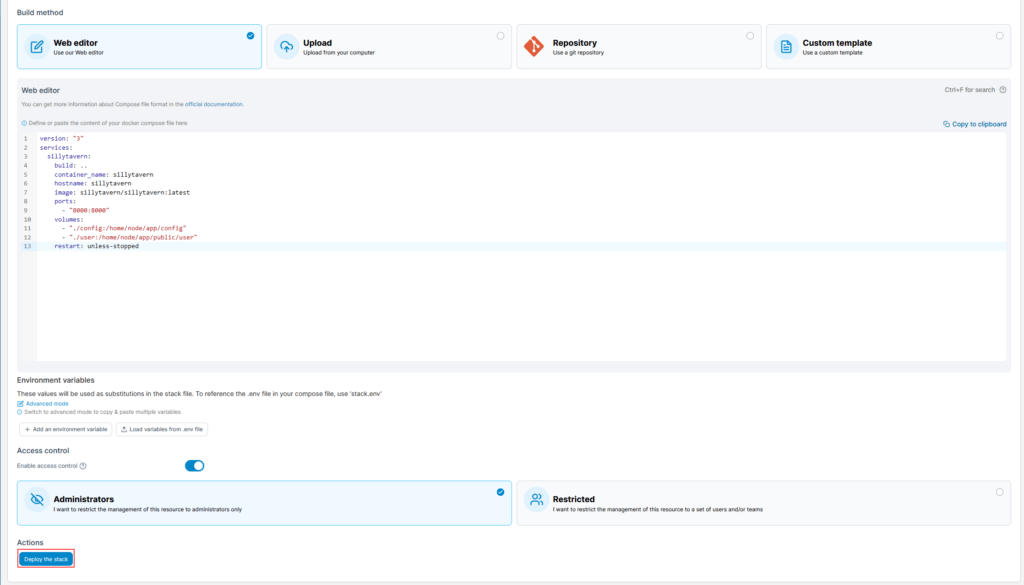
docker-compose.yml:
version: "3"
services:
  sillytavern:
    build: ..
    container_name: sillytavern
    hostname: sillytavern
    image: sillytavern/sillytavern:latest
    ports:
      - "8000:8000"
    volumes:
      - "./config:/home/node/app/config"
      - "./user:/home/node/app/public/user"
    restart: unless-stopped
Kopiert die docker-compose.yml einfach 1:1 in den Web Editor und klickt danach „Deploy the Stack“. Euer Docker Container sollte dann innerhalb weniger Sekunden laufen.
Configure access authorization to SillyTavern UI
For security reasons, you may be confronted with the following message upon access:
Forbidden: Connection attempt from 192.168.178.123. If you are attempting to connect, please add your IP address in whitelist or disable whitelist mode in config.conf in root of SillyTavern folder.
By default, only localhost (127.0.0.1, I remember this funny story ) is enabled. Therefore you have to add your IP to the whitelist in the SillyTavern Docker Container add. If you want to unlock your whole home network you can simply enter this in CIDR notation e.g. 192.168.178.0/24
Of course, you should only give access to the entire home network if you know that you don't have anyone else on the network who can play tricks 😉
Otherwise, however, you have the option of switching on Basic Auth and switch on a password prompt before the SillyTavern UI.
On your Docker host, change to the following file /data/compose/13/config/config.conf and change
const whitelist = ['127.0.0.1']; //Example for add several IP in whitelist: ['127.0.0.1', '192.168.0.10']to
const whitelist = ['127.0.0.1', '192.168.178.0/24']; //Example for add several IP in whitelist: ['127.0.0.1', '192.168.0.10']Now restart the Docker container once via the Portainer interface and the access should work.
On $IP:8000 (e.g. http://192.168.178.123:8000) you will then reach the SillyTavern UI.
Migrate existing data
First you have to find the data from your previous installation. This is located under /SillyTavern/public (SillyTavern is the root directory of the installation).
nils@REDACTED:~/SillyTavern/public$ ll
total 1320
drwxr-xr-x 26 nils nils 4096 Nov 2 22:26 ./
drwxr-xr-x 15 nils nils 4096 Oct 29 18:50 ../
drwxr-xr-x 7 nils nils 4096 Oct 29 18:50 assets/
drwxr-xr-x 2 nils nils 4096 Oct 1 13:11 backgrounds/
drwxr-xr-x 4 nils nils 4096 Nov 2 22:20 characters/
drwxr-xr-x 17 nils nils 4096 Oct 29 18:51 chats/
drwxr-xr-x 2 nils nils 4096 Oct 29 18:50 context/
drwxr-xr-x 2 nils nils 4096 Nov 2 21:42 css/
-rw-r--r-- 1 nils nils 12014 Oct 1 13:11 favicon.ico
drwxr-xr-x 2 nils nils 4096 Oct 1 13:11 'group chats'/
drwxr-xr-x 2 nils nils 4096 Oct 1 13:11 groups/
-rw-r--r-- 1 nils nils 272666 Oct 10 19:38 i18n.json
drwxr-xr-x 3 nils nils 4096 Oct 10 19:38 img/
-rw-r--r-- 1 nils nils 371313 Oct 29 18:50 index.html
drwxr-xr-x 2 nils nils 4096 Oct 10 19:38 instruct/
-rw-r--r-- 1 nils nils 611 Oct 1 13:11 jsconfig.json
drwxr-xr-x 2 nils nils 4096 Oct 10 19:38 'KoboldAI Settings'/
drwxr-xr-x 3 nils nils 4096 Oct 1 13:11 lib/
drwxr-xr-x 2 nils nils 4096 Oct 1 13:11 movingUI/
drwxr-xr-x 2 nils nils 4096 Oct 1 13:11 'NovelAI Settings'/
drwxr-xr-x 2 nils nils 4096 Oct 1 13:11 'OpenAI Settings'/
drwxr-xr-x 2 nils nils 4096 Oct 1 13:11 QuickReplies/
-rw-r--r-- 1 nils nils 26 Oct 1 13:11 robots.txt
-rw-r--r-- 1 nils nils 335586 Oct 29 18:50 script.js
drwxr-xr-x 4 nils nils 4096 Oct 29 18:50 scripts/
-rw-r--r-- 1 nils nils 35364 Nov 2 22:23 settings.json
drwxr-xr-x 2 nils nils 4096 Oct 1 13:11 sounds/
-rw-r--r-- 1 nils nils 911 Nov 2 22:26 stats.json
-rw-r--r-- 1 nils nils 125279 Oct 1 13:11 st-launcher.ico
-rw-r--r-- 1 nils nils 72425 Oct 29 18:50 style.css
drwxr-xr-x 2 nils nils 4096 Oct 1 13:11 'TextGen Settings'/
drwxr-xr-x 2 nils nils 4096 Oct 1 13:11 themes/
drwxr-xr-x 3 nils nils 4096 Oct 1 13:16 user/
drwxr-xr-x 2 nils nils 4096 Oct 1 13:16 'User Avatars'/
drwxr-xr-x 3 nils nils 4096 Oct 1 13:11 webfonts/
drwxr-xr-x 2 nils nils 4096 Oct 1 13:16 worlds/
The names are actually self-explanatory. For chat histories and character itself, only the folders „characters“ and „chats“ are important. Each folder can be transferred independently if you want to take more with you.
You must transfer these folders from your old installation to your Docker host and then move them to the directory /data/compose/13/config/ verschieben. „13“ ist hierbei eine Variable, die ihr im Portainer herausfindet, indem ihr auf den Container klickt und dann unter „Labels“ search for „com.docker.compose.project.working_dir“ .
Your SillyTavern in Docker should now look like your old installation. If you have any questions and/or problems, please use the comment function here.